
Recliner Spring Replacement – Complete Repair Guide
Learn how to identify broken springs, replace sagging seat springs, and restore the comfort and support of your recliner chair with this step-by-step guide.
VIEW REPAIR GUIDEIs your recliner sagging, squeaking, or leaning to one side? These are common signs that your recliner springs need replacement. This guide will help you diagnose the problem and walk you through the repair process so you can bring your favorite chair back to life.
Why Recliner Springs Fail & When to Replace
Recliner springs are the backbone of your chair's comfort. Over time, constant use, weight, and general wear can cause springs to lose tension, break, or become misaligned. Common symptoms of spring failure include:
- Sagging seat – the middle of the seat dips noticeably when you sit.
- Leaning or tilting – the chair feels uneven or leans to one side.
- Squeaking or creaking – especially when reclining or changing positions.
- Visible damage – you can see broken or stretched springs under the chair.
If your recliner is uncomfortable or unsafe to sit in, replacing the springs is often more cost-effective than buying a new chair. Most quality recliner types can have their springs replaced with basic tools and a little patience. For power recliners and lift chairs, the process may be slightly more complex due to wiring and motor components, but the spring mechanism itself is still repairable.
Before you begin, it's important to identify the type of spring system in your chair. Most recliners use either zig-zag (sinuous) springs, coil springs, or torsion springs. This guide focuses on the most common: zig-zag spring replacement, which is found in the majority of modern recliners.
Tools & Materials You'll Need
Before starting your spring replacement project, gather the following tools and materials. Having everything ready will make the process smoother and safer.
Springs are rated by gauge (thickness) and length. Measure the existing springs or check your recliner's manual to ensure you purchase the correct replacements. For most standard recliners, springs range from 9 to 12 gauge and 12 to 18 inches in length. If you're unsure, consulting a recliner care professional or your chair's manufacturer can help you avoid buying the wrong parts.
Step-by-Step Spring Replacement Guide
Follow these steps carefully to remove and replace the springs in your recliner. The process may vary slightly depending on your recliner model, but the core principles remain the same.
Step 1: Prepare Your Workspace & Recliner
Place your recliner on a flat, solid surface with good lighting. If possible, work in a garage or workshop where you have plenty of room to maneuver. For power recliners, ensure the chair is unplugged from the wall outlet. Remove any cushions, pillows, or accessories from the chair. Tilt the recliner backward or lay it on its side to access the underside. It's helpful to take photos of the spring layout before you begin disassembly so you have a reference when installing the new springs.
Step 2: Remove the Dust Cover & Inspect the Springs
Most recliners have a dust cover (a thin fabric or cardboard sheet) stapled or nailed to the bottom of the frame. Carefully remove the staples or nails using a flathead screwdriver or pliers. Once the cover is removed, use your flashlight to inspect the spring system. Look for broken, stretched, or disconnected springs. Pay attention to how the springs are attached to the frame – they are usually secured with clips, hooks, or brackets. For lift chairs, be mindful of the lifting mechanism and motor cables; avoid pulling or damaging them.
Step 3: Remove the Damaged Springs
Using your pliers and wire cutters, carefully disconnect the damaged spring from its anchor points. If the spring is broken, you may need to cut it into smaller pieces to remove it safely. For springs held in place with clips, gently pry the clips loose with a flathead screwdriver. Be careful not to damage the frame or surrounding components. If you're replacing multiple springs, it's a good idea to remove them one at a time and replace them immediately so you don't lose the alignment. For manual recliners, the process is generally simpler as there are no electrical components to work around.
Step 4: Install the New Springs
Take your new replacement springs and compare them to the old ones to ensure they match in length and gauge. Begin by attaching one end of the new spring to the frame anchor using the appropriate clips or hooks. Then, stretch the spring to the opposite anchor point and secure it. If you're using a spring stretching tool, it can make the process easier, but pliers can also work. Make sure the spring is properly tensioned – not too loose (sagging) and not too tight (uncomfortably firm). If you're replacing multiple springs, install them in the same pattern as the original. For ergonomic recliners, precise tension is crucial for maintaining proper lumbar support and posture alignment.
Step 5: Reassemble & Test the Recliner
Once all new springs are securely in place, reattach the dust cover using staples or small nails. Flip the recliner back to its upright position and test the seat by sitting in it. Check for any squeaking, sagging, or unevenness. Recline the chair through its full range of motion to ensure the springs function smoothly with the mechanism lubrication and other moving parts. If you're satisfied with the repair, your chair is ready to use. If you notice any issues, double-check the spring attachments and tension. You may need to adjust the position of one or more springs for even support.
Cost of Spring Replacement vs. Professional Repair
One of the most common questions is whether to DIY or hire a professional. Here's what you can expect in terms of costs and when to consider professional help.
DIY Spring Replacement Costs
Replacement springs (set of 4–6): $25–$60
Spring clips & hardware: $10–$20
Tools (if you don't have them): $20–$40
Total DIY: ~$55–$120
Professional repair (parts + labor): $150–$350
New recliner cost: $300+
As you can see, DIY spring replacement is significantly more affordable, especially for those who already own basic tools. However, consider professional help if:
- You're uncomfortable working with tools or metal components.
- The frame is damaged or rusted, requiring welding or additional repairs.
- Your recliner is a high-end model with complex mechanisms (zero gravity recliners or massage recliners often have intricate systems).
- You've attempted the repair and the problem persists.
When choosing a professional, look for a furniture repair specialist or an upholsterer with experience in recliner care. Always ask for a quote before committing to the repair.
Preventive Maintenance to Extend Spring Life
Once you've replaced your recliner springs, follow these tips to keep them in good condition for years to come.
- Weight distribution: Avoid sitting on the edge of the seat or putting excessive weight on one side. Distribute weight evenly to reduce stress on individual springs.
- Regular cleaning: Vacuum the underside of your recliner periodically to remove dust and debris that can cause friction and wear. This is especially important for fabric recliners and leather recliners where particles can get trapped in the mechanism.
- Lubrication: Apply a silicone-based lubricant to the mechanism lubrication points annually. This reduces friction on springs and other moving parts, preventing premature wear.
- Avoid overloading: Don't use your recliner as a trampoline or allow children to jump on it. The extra impact can damage springs and the frame.
- Check for wear: Inspect the springs and clips every six months for signs of rust, stretching, or loosening. Catching problems early makes repairs easier and cheaper.
By following these simple maintenance steps, you can significantly extend the life of your recliner and avoid the need for frequent spring replacement. A well-maintained recliner can provide comfortable support for 10–15 years or more.
Frequently Asked Questions About Recliner Spring Replacement
How long does it take to replace recliner springs?
For an experienced DIYer, the process takes about 1–2 hours. Beginners may need 3–4 hours, including the learning curve. Professional repairs are usually completed within 1–2 days depending on parts availability.
Can I replace just one broken spring?
Yes, but it's often recommended to replace all springs in the set to ensure even tension and balanced comfort. Springs wear at different rates, and a single new spring can create an uneven feel. Replacing all springs at once ensures consistent support.
How do I know if my recliner needs spring replacement or another repair?
If the seat sags, leans, or feels bouncy, it's likely a spring issue. If the chair doesn't recline properly or the footrest won't stay up, the problem may be with the mechanism or cables. Our recliner checklist can help you diagnose common recliner problems.
Is spring replacement worth it on an old recliner?
If the frame is in good condition and the upholstery is still acceptable, spring replacement is definitely worth it. It's much cheaper than buying a new recliner and can give your favorite chair many more years of comfortable use. For high-quality leather recliners and power recliners, spring replacement is a smart investment.
Do power recliners and lift chairs have special spring requirements?
Yes. Power and lift chairs often have additional components like motors, wiring, and sensors that require extra care during disassembly. Always unplug the chair and follow the manufacturer's service manual if available. In many cases, the spring system is similar to manual recliners, but you'll need to work around the electrical components. If you're unsure, consult a professional.
Ready to Fix Your Recliner? Get the Right Springs
Spring replacement is one of the most effective ways to restore your recliner's comfort and support. Whether you're fixing a sagging seat or a squeaky mechanism, the right springs and a little know-how can make all the difference.
If you're ready to tackle this project, start by measuring your existing springs or consulting your recliner's manual. For most standard recliners, we recommend using high-quality 10-gauge sinuous springs for durability and lasting support. For oversized recliners and big & tall recliners, consider heavier-gauge springs to accommodate additional weight.
Check out our recommended products below to find the right springs and tools for your repair. With the right parts and this guide, you'll have your recliner feeling like new in no time.
Top Spring Replacement Kits & Tools
⚠️ AFFILIATE DISCLOSURE: This website contains affiliate links. As an affiliate Associate, we earn from qualifying purchases. If you make a purchase through these links, we may receive a small commission at no additional cost to you. Read our full affiliate policy.

kzfuli 3-5/8 Inch Replacement Recliner Chair Mechanism Furniture Tension Springs Long Neck Style ,Long Neck Hook Style-Recliner Replacement Parts-3.46 Inch Inside Hook to Hook (Silver White 2Pcs)
Check price on Amazon
7" Recliner Tension Spring Replacement Kit with spring puller, 2 Pack | Long Neck Hook Steel Spring
Check price on Amazon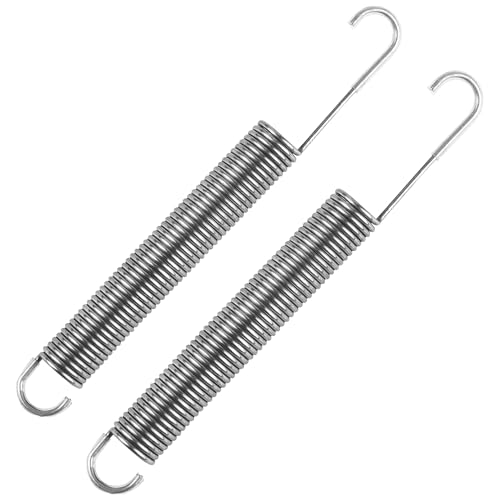
Zookpr 2Pcs 7 Inch Recliner Springs Replacement Sofa Chair Mechanism Spring
Check price on Amazon
remolean 3-5/8'', 2-7/8'', 7'', 4-1/2'', 2'', 2-1/2'', 6-1/2'', 6-1/4'', 4-3/4'' Recliner Springs Replacement Parts
Check price on Amazon
7 inch Recliner Springs Replacement, Stainless Steel Tension Spring
Check price on Amazon
Kaupuar 21" Sofa Upholstery Spring Replacement Kit for Repair Couch Recliner Parts Chair fix Sagging seat
Check price on Amazon